Tech
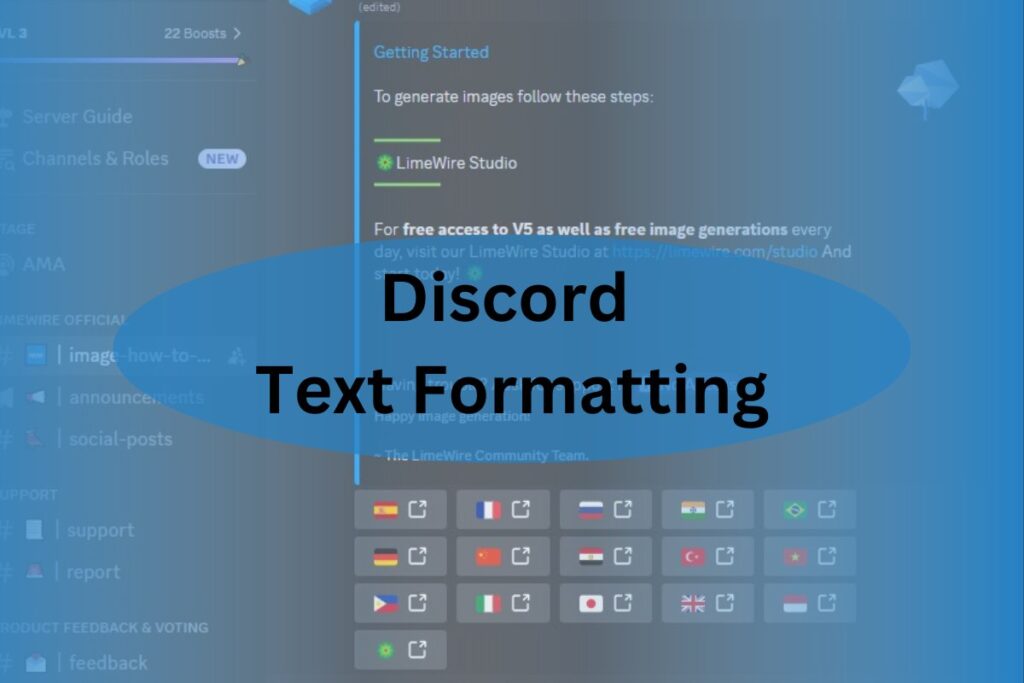
Discord Text Formatting/Commands: Strikethrough, Bold & More

The gaming Industry is growing rapidly, gone are those days when we used to sit in our homes and play games alone, now, it has become convenient and the new normal to play games with friends and in communities. There are several community platforms on the internet providing game enthusiasts an opportunity to build and join gaming communities. Discord is one of the most popular for gamers to join gaming communities, there are thousands of gaming communities available on this platform.
Usually, a community member can communicate with voice and text channels. Most members prefer to chat by text as it is convenient and one can chat with others causing disturbance to others. As text channels are the preferred ones in gaming communities, it becomes helpful to know Discord text formatting for ease of texting.
In this post, we will help you understand Discord text formatting. It will help you to stand out in the gaming community.
Common Discord Text Formatting Table
| Discord Text Formatting | Command For Formatting |
| Spoiler Tag | ||Your Text|| |
| Single Line Code Block | `Your Text` |
| Bold | **Your Text** |
| Underlined | __Your Text__ |
| Strikethrough | ~~Your Text~~ |
| Italics | _Your Text_ or *Your Text* |
| Underline italics | __*Your Text*__ |
| Single Line Quote | > Your Text |
| Multiple Line Code Blocks | “`Your Text“` |
| Bold Italics | ***Your Text*** |
| Underline bold | __**Your Text**__ |
| Empty Lines | Shift+Enter |
| Multiple lines Line Quote | >>> Your Text |
| Underline bold italics | __***Your Text***__ |
About Discord Markdown
Discord uses Markdown language for all kinds of text formatting such as italics, bold, underline, and more. This language is commonly used in readme files, forums, and simple text editors because it is lightweight and easily works in the background without disturbing other operations.
Usage Of Discord Text Formatting
Discord text formatting can be an amazing tool for every user to give their text a unique look. It helps your text to highlight and stand out from other messages. You can do multiple things like make your text bold, Italic, Bold & Italic, and more. If you want to learn all this, read this section carefully and memorise all Discord Text formatting to use them conveniently. We are explaining some of them below
1. Spoiler Tag
Ever feel the need to hide a particular part of the message for a specific group of people? If yes, then spoiler tag text formatting is the one you need. Using this text formatting, you can hide a particular part of a message and leave it to readers as to whether they want to read the hidden part or not. For example, you are talking about a gaming level in the community and sharing an important point which can be useful to clear that level without much effort. Some players would like to read that part and clear the gaming level without any effort, while others would want to avoid reading it to clear the gaming level on their own.
In such scenarios, spoiler tag text formatting can be used.
Spoiler Tag Discord Command
||Your Text||
2. Bold
If you want to bold your text and highlight it in the community chat, use this Text formatting:
Bold Tag Discord Command
**Your Text**
3. Underline
The underlining of texts makes them look different and grab the attention of readers. You can use this formatting to underline in Discord:
Underline Tag Discord Command
__Your Text__
4. Strikethrough Text
If you want to point out a mistake or correct something before highlighting the wrong version of the text, you can use strikethrough text for it.
Strikethrough Text Discord Command
~~Your Text~~
5. Italics
Italics make your text look fashionable and highlight it. You can use Italic text style with this command:
Italics Text Discord Command
_Your Text_ or Your Text*
6. Empty Lines
Ever faced a situation when you pressed the enter button for an empty line but ended up sending the already written portion? If yes, then you need to learn the empty lines command. It will help you to create empty lines.
Empty Lines Text Discord Command
Shift+Enter
Apart from these commands, there are several other useful Discord Text Commands available. You can refer to the table given above and search in the help centre of Discord for more shortcuts.
At Last
Gaming is fun and it gets even better with others. Joining a gaming community introduces you to many new tricks and helps in make new friends. Discord is one of the most popular and widely used community platforms. We have mentioned many text formatting commands in this post and hope they are useful for you. If you have found this post about Discord Text formatting useful, then share it with your other community members.


Tech
How To Develop Oxzep7 Software: Step-by-Step Guide to Scalable, Automation-Driven Productivity Tools

Oxzep7 software is a modern and modular productivity platform. It denotes something that automates workflows, manages data, and helps businesses conduct their business operations successfully. You can consider it as a customizable backbone system that empowers tasks, operations, projects, and other internal tools.
Also Read : BetechIT.com Contact Directory: Your Guide to Hassle-Free Communication
Developing this type of platform is not easy and requires knowledge of multiple domains, like writing code, designing, ensuring security, and more. The overall aim is to make people more productive and automate repetitive tasks. If you want to build a similar software, this guide is for you. Let’s discuss its development process.
Define What Your Oxzep7 Tool Will Actually Do
Before finalizing the tech, get clear about what you want. Asking these questions will bring clarity:
Who are the primary users? (Operations team, sales, HR, devs, freelancers?)
What slows them down today? (Manual data entry, switching tools, approvals, reporting?)
What type of productivity tool are you building?
Task & project management
Workflow automation
Internal dashboard/control panel
Data/reporting hub
Turn these into concrete outcomes, e.g.:
“Reduce manual spreadsheet work by 40%”
“Cut approval cycle time from 3 days to 6 hours.”
These outcomes will guide every decision that follows.
Design The Architecture For Scale From Day One
A scalable, productivity-oriented platform needs a clear and modular architecture:
Backend:
Use a REST or GraphQL API.
Consider Node.js (Express/Nest) or Python (FastAPI/Django) for fast iteration.
Frontend:
Use React, Vue, or Angular for dynamic UIs.
Component-based design makes it easy to add new screens and widgets.
Database:
PostgreSQL or MySQL for structured relational data (tasks, users, projects).
Add Redis for caching and queueing background jobs.
Infrastructure:
Containerize with Docker.
Use Kubernetes or a managed service (like ECS/GKE/AKS) once traffic increases.
The primary goal should be to make each major part, like auth, tasks, automation and reporting, loosely coupled, so you can update or scale pieces without breaking the whole system.
Model Your Data Around Real Workflows
The data model plays a crucial role in developing an ideal productivity software.
Familiar entities in an Oxzep7-style tool:
Users, roles, teams
Tasks, projects, pipelines, or tickets
Workflows/automation rules
Attachments, comments, activity logs
Integrations (e.g., CRM ID, ticket ID, external system IDs)
Focus on:
Relationships (one project → many tasks; one user → many teams)
Auditing (who changed what, and when)
Soft deletes & versioning, so you don’t lose critical business history.
A well-designed schema makes querying, reporting, and scaling much easier later.
Build the Core Productivity Features First
Instead of focusing on everything simultaneously, first prepare the core feature set:
Task / Item Management
Create, update, assign, prioritize.
Filters, tags, and search.
Automation Engine (Oxzep7’s “magic”)
Trigger → Condition → Action model.
Example: “When a new lead is created, assign it to the Sales team and send a Slack notification.”
Implement with background workers (e.g., Celery, BullMQ, Sidekiq-style queues).
Collaboration Tools
Comments, mentions (@username).
Activity timelines on tasks or projects.
Analytics & Reporting
KPIs: throughput, completion time, bottlenecks.
Dashboards with charts built using libraries like Chart.js, Recharts, or ECharts.
Ship a solid v1 Productivity Core before touching advanced extras like AI recommendations or complex integrations.
Prioritize Security, Roles, and Permissions
Productivity tools are the most used in a business, so their security should be the topmost priority:
Authentication
JWT or session-based auth.
Optional SSO (Google/Microsoft/Okta) for enterprises.
Authorization / RBAC (Role-Based Access Control)
Roles (admin, manager, member, viewer).
Permissions per module: who can create, edit, delete, or just view.
Data Protection
HTTPS everywhere.
Encrypt sensitive data at rest where necessary.
Regular dependency updates and vulnerability scans.
Make security and access control part of the architecture, not an afterthought.
Use CI/CD And Cloud-Native Practices
To keep Oxzep7 scalable and flexible to maintain in the future:
Set up CI/CD pipelines (GitHub Actions, GitLab CI, CircleCI) to:
Run tests on every commit.
Auto-deploy to staging.
Use infrastructure-as-code (Terraform, Pulumi) for consistent environments.
Add logging & monitoring:
Centralized logs (ELK stack, Loki, or a SaaS tool).
Metrics & alerts (Prometheus, Grafana, Datadog).
It reduces deployment friction and keeps reliability high as you add more features.
Make UX Your Competitive Advantage
Even scalable productivity tools couldn’t reach their full potential when they lack these things:
Clean layout, minimal clicks for everyday actions
Keyboard shortcuts for power users
Fast, responsive UI with optimistic updates
Clear onboarding: tooltips, sample data, walkthroughs
So make sure to run usability tests early with real users. A slight UX improvement can create a huge productivity gain.
Evolve Oxzep7 With Feedback and Telemetry
After launch:
Track usage: which features are actually used? Which are ignored?
Collect feedback inside the app (emoji reactions, quick surveys, feedback forms).
Iterate in short cycles: ship small improvements, not giant rewrites.
Scalable productivity tools are never done. They need regular updates and changes to meet work standards.
Frequently Asked Questions (FAQs)
What Is Oxzep7 Software, Exactly?
It is not a single product, but used to refer to modern, modular productivity platforms that help automate workflows, manage data, and scale the business.
Which Tech Stack Is Best For Building Oxzep7 Software?
A common pattern is React or Vue on the frontend, Node.js/Express or Python/FastAPI on the backend, and PostgreSQL as the database, containerized with Docker and deployed to a primary cloud provider.
How Long Does It Take To Build An Oxzep7-Style MVP?
Generally, it takes around 8 to 16 weeks to build something with a dedicated team.

Walmart is one of the world’s biggest retailers, it is a multinational company, with operations in more than 20 countries worldwide. With such a huge network of retail counters, it is serving millions of people. When you cater such a huge population, availability of multiple payment sources becomes a necessity. In this article, we will know whether Apple Pay is accepted at Walmart or not, so let’s begin.
Also Read : Maria Taylor’s Big Move: New Host Role on NBC’s Football Night in America
Does Walmart Accept Apple Pay?
No, Walmart does not accept Apple Pay or any NFC-based payment options such as Google Pay.
During checkout, if you try to pay using Apple Pay, the payment will be declined. The official payment mode available at Walmart is Walmart Pay, which integrates your cards with their system and allows you to pay.
Why Walmart Chooses Walmart Pay Over Apple Pay?
There can be several reasons behind this, but as per our analysis, the primary two reasons are as follows:
Control & Savings
By developing and maintaining an in-house payment system, Walmart saves a tremendous amount in transaction fees or commissions which are required in the case of third-party payment service providers. Also, it keeps data in-house and helps in several ways.
Customer Engagement
It engages customers, they install Walmart apps on their mobile phones for payment, and end up checking for other items, sales, and more.
Can I Use My Apple Card to Make Payments at Walmart?
Yes, you can use your Apple Card to make payments at Walmart. To do so, you need to link your Apple Card with Walmart Pay.
Accepted Payment Options at Walmart
Walmart accepts a variety of payment options for shoppers’ convenience. Here is the list of primary payment options available at Walmart:
- Walmart Pay
- Credit and Debit Cards
- Walmart Gift Cards
- Cash, PayPal (online), EBT, Affirm, Walmart Money Card, Store Credit, and Health Spending Cards.
Frequently Asked Questions (FAQs)
Can I Use Apple Pay At Walmart?
No, Walmart doesn’t support Apple Pay or any NFC payment options. You need to pay via other eligible payment methods.
Do I Earn Cashback On My Apple Card to Make Payments at Walmart?
Yes, Walmart transactions are eligible to earn cashback as per the applicable cashback rates while paying via Apple Card.
Why Doesn’t Walmart Accept Apple Pay?
Apple Pay is a popular payment option and it has significant users, but still Walmart doesn’t accept it, maybe to avoid third-party fees and keep their transaction data secure.
Conclusion
Walmart is the first choice of millions of people when shopping for groceries, electronics, and other necessary items. It is available in multiple countries and caters to a large population worldwide. It accepts several payment modes, but Apple Pay is missing from the list. In this article, we discussed the potential reasons for this and the alternative payment options available at Walmart, and we shared other helpful information. We hope that you like reading this post and find it informative. If so, then do share it with others as well.

Artificial Intelligence (AI) is becoming the most talked about and used technology of this century. It is changing the way we used to do everything. Today, several tools exist that run primarily on AI technology to generate content. Neural. Love is one of them. In this article, we will explore the unique features of this AI image generation tool, so let’s start.
Also Read : Flick Social Media Tool: A Transparent Review for Marketers
What Is Neural.love?
Neural.love is an AI-based image generation and editing tool designed to offer high-quality, customizable results for creating images, avatars, and videos and enhancing the visuals of existing pictures and videos using machine learning algorithms. Users only need to upload their content or give a command in precise wording or both to generate their desired images and videos.
Key Features of Neural.love
AI Image Generation
Neural.love can generate amazing images like DALL E and Midjourney using AI technology. Just describe precisely worldwide what you want, and Neural.love will convert your imagination into visuals.
AI Avatar Creator
You can create AI avatars and personalized ones using Neural. Love, these avatars are ideal for use in games and as profile photos.
Image Enhancement
Users can enhance their image clarity and convert low-quality images into high-quality ones using Neural.love.
User-Friendly Dashboard
Neural.love is easy to use and its dashboard is beginner-friendly, unlike other complex AI tools, anyone with average technical skills can use this platform.
Pros and Cons of Neural.love
Pros of Neural.love
- No design experience is required
- Fast and accurate image generation
- Affordable compared to some other AI platforms
- Supports avatar creation and image enhancement
- No software installation is needed – fully web-based
Cons of Neural.love
- Some results may lack fine detail or need minor touch-ups
- Limited free credits and paid plans are required for heavy use
- AI video feature still under development
Pricing
Neural.love offers both free and paid plans; you can choose any one based on your requirements. The free plan comes with several limitations, like limited image generation, longer wait time, slow downloads, and more.
Is Neural.love Worth It?
If you are a professional content creator or your work requires the generation of high-quality images, then you can consider buying its premium version. For a normal user, its free version is more than enough.
Frequently Asked Questions (FAQs)
Is Neural.love Free to Use?
Yes, Neural.love is free to use, but it has limited features; for full features, you will need to purchase its premium version.
Can I Use Neural.love On Mobile?
Yes, you can access Neural.love from mobile. It is a web application that you can easily access with multiple devices.
Does Neural.love Allow Commercial Use of Generated Images?
Generally, all AI-generated images are unique, and again, AI does not generate the same image, which makes them ideal for commercial usage. However, you can read the platform’s terms and conditions for more clarity on this topic.
Conclusion
Artificial intelligence is changing the image industry. Now, we can generate high-quality and unique images within seconds. Just describe what you want, and AI will generate it with you. In this article, we discussed several details about Neural.love, an AI-based image generation tool. We hope that you like reading this post and find it informative. If so, then do share this post with others as well.


Freedworldtech’s Guide to the Best Tech News Sources for Staying Ahead in the Digital World

Shop Buy Qoghundos Explained: Understanding the Emerging Online Shopping Trend

82.51 × 63 Explained: What This Measurement Means and Where It Appears in Real Life
Best Kickass Proxy List 2024 – 100% Working to Unblock to Access

Banging The Underdog Incident 2022

TamilRockers Proxy 2025: 20+ Working Links, Mirror Sites & VPN Guide
-
Entertainment2 years ago
Best Kickass Proxy List 2024 – 100% Working to Unblock to Access
-
 Lifestyle2 years ago
Banging The Underdog Incident 2022
-
Entertainment2 years ago
TamilRockers Proxy 2025: 20+ Working Links, Mirror Sites & VPN Guide
-
 Entertainment2 years ago
TamilMV Proxy Sites List 2025 – How to Unblock TamilMV Safely?
-

 Fashion2 years ago
Trendy Midi Dresses for Casual Wear: Hair Care Tips Included!
-
 Entertainment2 years ago
Pirate Bay Proxy List 2025: Access The Pirate Bay Safely
-

 Technology2 years ago
SSIS 469 – Detailed Guide to Understand The Features and Benefits
-

 Blog2 years ago
Cy Kass – Family Detail of Alex Wagner and Sam Kass